In this text Photoshop tutorial, we'll learn how to easily create metallic text - a popular effect widely used in video games and movie posters! This may seem like a lot of steps, but once you've done it a few times, creating this effect won't take you more than a few minutes from start to finish. To create a metallic texture and apply it to the text, we will use a couple Layer Styles(Layer styles), multiple filters, layer blending modes and Clipping mask ( Clipping mask)! For this tutorial I will be using Photoshop CS5, but this tutorial is also suitable for earlier versions.
Here is the final result that we will create:
The final "metal text" effect.
Step 1: Create a new document
Create a new Photoshop document by going to the menu File - Create(File - New) or press Ctrl+N (Win) / Command+N (Mac) on your keyboard.

Go to File - New.
You'll need to create a document that's a little larger than you need, for reasons I'll talk about in due course. I'll create my document at 1200px. By Width(Wide) and 600 px. By Height(High) Permission(Resolution) I'll leave it at the default 72 pixels/inch. You can use these same settings to follow me further through the tutorial, or enter your own values. Set the parameter Background content(Background Contents) on White(White), even though we will change it in the next step. Click OK when finished. Your new document will appear on the screen:

New Document dialog box.
Step 2: Fill the background with black
Press the letter D on your keyboard for a quick reset Main(Foreground) and Background(Background) colors to default, if necessary, this action will set as Main(Foreground) colors black. Then press Alt+Backspace (Win)/ Option+Delete (Mac) to quickly fill the background with the current Main(Foreground) color (black):

The document is now filled in black.
Step 3: Add a New Blank Layer
Click on the create icon New layer(New layer) at the bottom of the layers panel:

Click on the New Layer icon (second icon from the right).
Photoshop will add a new blank layer called "Layer 1" above Background(Background) layer:

The new layer appears above the Background layer.
Step 4: Fill the New Layer with Bright Gray
Go to menu Editing(Edit) at the top of the screen and select Fill(Fill):

Go to Editing - Fill.
Fill(Fill), click on the drop-down menu to the right of the word Use(Use) and select Color(Color) from the list of parameters:
Select the Color option at the top of the Fill dialog box.
Once you select Color(Color), Photoshop will open the color palette so you can select the color you want to fill the layer with. Choose bright gray. If you want to use the same shades of gray as I did, enter 195 for the R, G, and B parameters:

Choose bright gray from the color palette.
Click OK when you're ready to exit the color palette, then click OK to exit the dialog box Fill(Fill). Photoshop will fill the layer with gray, temporarily hiding the background layer, which is filled with black:

The document is now grayed out.
Step 5: Add Noise
Go to menu Filter(Filter) at the top of the screen, select Noise(Noise), then select Add noise(Add Noise):
![]()
Go to Filter - Noise - Add noise.
When the dialog box appears Add noise(Add Noise), add a lot of noise to the image by setting the value Effect(Amount) about 150%. Make sure the options are checked at the bottom of the dialog box According to Gauss(Gaussian) and Monochrome(Monochromatic):

Filter options Add Noise.
Click OK when ready to exit the dialog box. The document should now be filled with noise:

Document after applying the Add Noise filter.
Step 6: Apply the Motion Blur filter (MotionBlur)
We'll use all this noise to create the first part of our metallic texture. Go back to menu Filter(Filter), select Blur(Blur) and then select Motion blur(Motion Blur):
![]()
Go to Filter – Blur – Motion Blur (Filter – Blur – Motion Blur).
When the Motion Blur dialog box appears, set the Blur Angle to around -10 degrees, then reduce the Distance to 200 px:

Set the Angle to -10 and reduce the Distance to 200 px.
Click OK when you're ready to close the dialog box. Noise blur created a metallic effect:

Image after applying Motion blur to noise.
Step 7: Trimming the Edges
Back to step 1, I mentioned that you should create a document a little larger than needed. The reason is that the filter Motion blur(Motion Blur) creates the incorrectly blurred pixels along the edges of the document, which you can now clearly see in our document. Let's trim off those unwanted areas. Select a Photoshop tool Crop/Frame(Crop) from the toolbar or press the letter C to select this document using hotkeys:
Select the Crop tool.
With active instrument Crop/Frame(Crop) Click in the upper left corner where the well-textured area begins, then, without releasing the mouse button, drag the frame to the lower right corner to the edge of the well-textured area. Release the mouse button to see the area that you will save ( dark areas the edges will be trimmed):

Create a cutting area around the area you want to save.
Press Enter (Win) / Return (Mac) to have Photoshop trim off the unwanted edges. Now all that remains is a good texture:

Image after trimming the edges.
Step 8: Add Your Text
Select a tool Text(Type/Text) from the toolbar, or press the T hotkey on your keyboard:
Select the Text tool (Type).
With active instrument Text(Type/Text), select a font from the options bar at the top of the screen. For best results with this effect, choose a font with bold letters. I'll use Arial Black:
Font options in the options panel.
Once you've chosen a font, click inside the document and add your text. I will write the word “Metal”:

Add your own text.
When you're ready, click Apply current edit(Checkmark) in the Options Bar to apply the text:

Click Apply current edit (Checkmark) to exit text editing mode.
Step 9: Resizing the Text Using Free Transform (FreeTransform)
Your text will likely be too small at this point (as in my case), so go to the menu Editing(Edit) and select Free transformation(Free Transform) or press Ctrl+T (Win)/ Command+T (Mac) to call Free transformation(Free Transform) using hotkeys:

Go to Editing - Free transform.
This action will place a free transform window and handles around the text. To change the text size, hold down the Shift key and drag up any corner marker (small square). Holding the Shift key while resizing allows you to maintain the exact proportions of the text so you don't distort its shape. To move text, click anywhere inside the bounding box and simply move it with your mouse. When you're ready, press Enter (Win)/ Return (Mac) to apply the changes and exit. Free transformation(Free Transform):

Move and resize the text as needed.
Step 10: Move the Text Layer Below the Texture Layer
Click on the text layer in the layers panel and, while holding down the mouse button, place this layer between the gray texture layer (Layer 1) and the Background layer. When you see that a selected stripe has appeared between these two layers, release the mouse button and Photoshop will move the text layer to this place:

Place the text layer between the Background layer and Layer 1.
Step 11: Create a Clipping Mask (ClippingMask)
Click on Layer 1 in the Layers panel to select it. Then go to the Layer menu and select Create Clipping Mask(Create Clipping Mask):

Go to Layer - Create Clipping Mask.
Layer 1 will appear offset to the right in the Layers panel, indicating that it is now "clipped" by the text layer:

The Layers panel now shows that Layer 1 is now clipped to the text layer.
If we look in the document window, we can see that the gray texture is now only visible inside the text:

The black color from the background layer is now visible around the text.
Step 12: Adding a Layer Style (LayerStyle) Embossing (Bevelandemboss)
Click on the text layer in the Layers panel to select it. Then click on the icon Layer Styles(Layer Styles) at the bottom of the layers panel:

Click on the Layer Styles icon.
Select Embossing(Bevel and Emboss) from the list of layer styles that appeared:

Select Bevel and Emboss.
This action will open a dialog box Layer Styles(layer Syles) set to parameter Embossing(Bevel and Emboss) in the middle column. First change Method(Technique) on Hard cut(Chisel Hard), then increase Size(Size) up to 7 pixels. Drag the parameter slider Depth(Depth) towards the right to a value of 500%:

Bevel and Emboss Options.
In the settings section Shading(Shading), click on the thumbnail Gloss contour(Gloss Contour):

Click on the Gloss Contour thumbnail.
This action will open Path Editor(Contour Editor). Click on the drop down menu Settings(Preset) at the top of the dialog box and select from the list Ring(Ring):

Select the Ring setting.
Click OK to exit Contour Editor(Contour Editor). Then, return to the main dialog box Layer Styles ( Layer Styles), check the option Smoothing(Anti-aliased) to the right of the thumbnail Gloss contour(Gloss Contour):

Check the Anti-aliased option.
Don't close the dialog box yet Layer Styles(Layer Styles). We have some more to add, but your text is on this moment should be similar to this:

Text after applying the Bevel and Emboss layer style.
Step 13: Adding a Layer Style (LayerStyle) Gradient overlay (GradientOverlay)
Click directly on the title Gradient overlay(Gradient Overlay) in the left column of the dialog box Layer Styles(Layer Styles). You need to click directly on the name, not on the mark field, in order for the parameter to appear Gradient overlay(Gradient Overlay):

Click on the name Gradient Overlay.
In the middle column of the dialog box Layer Styles(Layer Styles) the marked parameters for Gradient overlays(Gradient Overlay). By default, Photoshop chooses a gradient based on the current colors From main to background colors(Foreground and Background colors) (black and white), but if another gradient is selected, click on the gradient preview bar:

Click on the gradient preview bar only if it is set to a gradient other than black and white.
Then click on the thumbnail From foreground to background(Foreground to Background) (top left) in Gradient Editor(Gradient Editor) to select it:
![]()
Select the Foreground to Background gradient.
Click OK to close Gradient Editor(Gradient Editor). Return to main dialog box Layer Styles(Layer Styles), change Blend Mode(Blend Mode) on Overlap(Overlay), then reduce Opacity(Opacity) up to 70%. This will add a highlight effect to the metal:

Gradient Overlay options.
Click OK to exit the dialog box Layer Styles(Layer Styles). Here is an effect with added layer styles:

The effect after applying layer styles.
Step 14: Adding a new layer set to Overlay mode (Overlay)
Click on Layer 1 in the Layers panel to select it. Alt-click (Win)/Option-click (Mac) the create icon New layer(New Layer) at the bottom of the layers panel:

Hold down Alt (Win)/Option (Mac) and click on the New Layer icon.
This action tells Photoshop to open a dialog box New layer(New layer) where we can set some parameters before the new layer is added. Check the option on the left that says Use Previous Layer to Create Clipping Mask(Use Previous Layer to Create Clipping mask), then change Mode(Mode) (shortly from Blend Mode(blend mode) on Overlap(Overlay). Click OK when you're ready to close the dialog box. A new empty layer called Layer 2, set to Overlap(Overlay), will appear above Layer 1 (layer 1) in the layers panel. Like Layer 1, it is clipped by the text layer below it:

New Layer dialog box.
Step 15: Applying the Clouds filter (Clouds)
Let's add random highlights and shadows to the metallic effect. For this we will use a Photoshop filter Clouds(Clouds) along with Blend mode(Blend Mode) Overlap(Overlay), which we have already set for the layer. Go to menu Filter(filter) at the top of the screen, select Rendering(Render) and then select Clouds(Clouds):

Go to the menu Filter - Rendering - Clouds (Filter - Render - Clouds).
“Clouds” create many light and dark areas:

Step 16: Apply the Gaussian Blur filter (GaussianBlur)
The clouds need to be smoothed out a little so that they look more like shadows and highlights. We will do this by blurring them. Go to menu Filter(Filter), select Blur(Blur) and then Gaussian blur(Gaussian Blur):

Go to the menu Filter – Blur – Gaussian Blur (Filter – Blur – Gaussian Blur).
When the dialog box appears Gaussian blur(Gaussian Blur), drag the slider to the right to increase the value Radius(Radius) up to 10 px.

Set the Radius to 10 px.
Here's the image after the clouds are blurred:

The cloud effect now looks more like a subtle lighting effect.
Step 17: Adding a new layer set to Multiply mode (Multiply)
Hold down Alt (Win)/Option (Mac) again and click on the create icon New layer(New Layer) at the bottom of the layers panel to open the dialog box New Layer(new Layer). Check the Use previous layer to create option Clipping Mask(Use Previous Layer to Create Clipping Mask), then change Mode(mode) on Multiplication(Multiply). Finally, check the Fill with neutral mode color option. "Multiplication"(white) (Fill with Multiply-neutral color (white)) at the bottom of the dialog box. Click OK when you're ready to close the window and add a new layer:

Add another new layer, this time in Multiply mode.
Step 18: Add Noise
Let's dirty up our metallic effect a little by applying stains and scratches. Go to menu Filter(Filter), then select Add noise(AddNoise). A dialog box will appear Add noise(Add Noise) with the same settings as we used earlier. There is no need to change them, just click OK to exit the dialog box. Now the text is filled with noise, and since the layer is set to Multiplication, only dark spots will be visible:

The Multiply mode hides the white colors, leaving only the dark specks of noise visible.
Step 19: Applying the Median filter (Median)
To turn the noise into something that sounds like dirt or scratches, go back to the menu Filter select again Noise and then select Median:

Go to the menu Filter - Noise - Median.
Filter Median(Median) is designed to remove noise from an image. Click in the window Radius(Radius) and use the up arrow key on your keyboard to gradually increase the value while looking at the image in the document window. As the radius value increases, the noise will disappear, leaving behind “clumps” that create the effect of dirt and scratches. The value is about 9 pixels. should do. Click OK when you're ready to exit the dialog box:

Increase the Radius value to reduce noise.
Step 20: Lower the Opacity (Opacity) layer
If the stain and scratch effect looks too dark, reduce Opacity(Opacity) layer. You will find the option Opacity(Opacity) in the top corner of the layers panel. I'll reduce mine to 70%:

Layer Opacity parameter.
And now we're done! Here is the final result of the metal text effect:

The final result of the “metal text” effect.
Editable text settings
One of the nice parts of making this metallic effect is that our text remains completely editable and we can even change the font we use if we don't like the one we started with! To change the font, just select the tool Text(type/Text) in the Tools panel, click on the text layer in the Layers panel to select it, then select any font from the Options panel (you may need to change the text size using Free transformation(Free Transform) - see Step 9). For example, I did not change anything except the font on Trajan Pro Bold:

Same effect, different font.
Here I have edited the text, changing the word from "Metal" to "Steel". If you save your document as Photoshop. PSD file, you can open it again any time you want and edit your text without recreating the metal texture:

Same effect, different text.
Sometimes, you need to quickly apply some effect and this is where actions come to the rescue. With one click of a button, you can easily recreate the desired effect.
In this tutorial we will create a metallic text effect while recording an action for it. At the end of the lesson, you will be able to reproduce this effect by simply clicking on the Play button in the Operations palette.
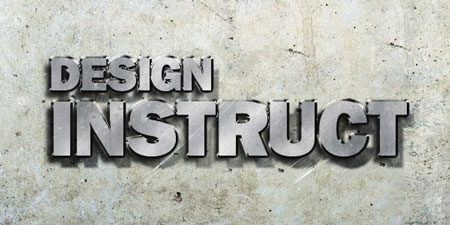
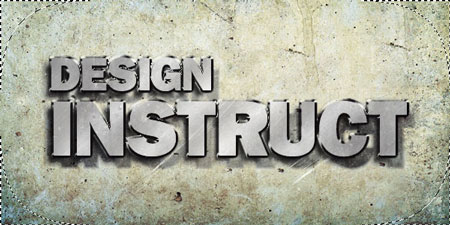
Final image:
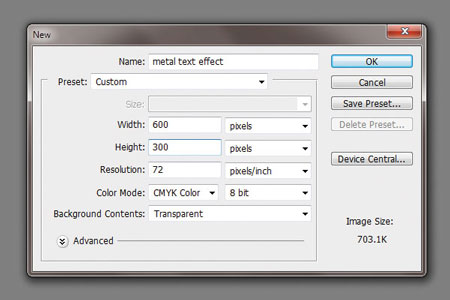
Step 1
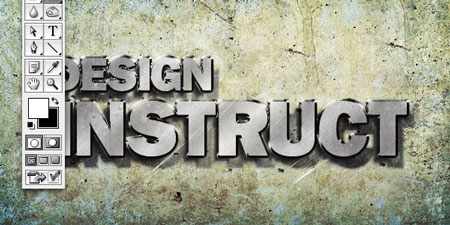
Create a new document (File - New) (File > New) ( Ctr + N) size 600x300 pixels with a resolution of 72 pixels/inch.
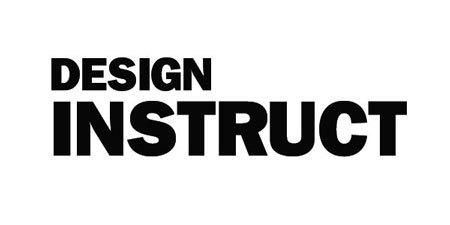
Tool Text(Horizontal Type Tool) ( T) and write the text “Design Instruct”. In my case, the font Franklin Gothic Heavy was used, but you can choose a different one. The main thing is that the font style is bold.
Step 2
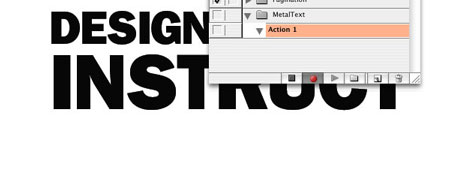
Before we continue, we need to create a new action that will record all our actions in this tutorial. Open Operations palette(Window > Actions) ( Alt+F9), click on the folder icon at the bottom of the palette (Create new set) and name this group “Metal Text”. Now click on the icon creating a new action(Create new action):
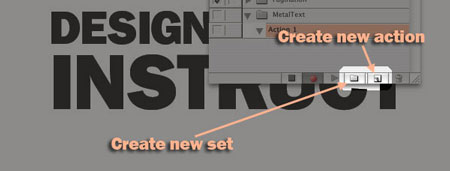
Once a new action is created, recording should start automatically (You will see a red circle at the bottom of the Actions palette indicating that recording has started).
Step 3
Go to the menu (Select > Load Selection) and then create a new layer ( Shift + Ctrl + N). Fill the new layer with white (#FFFFFF) and make the original text layer invisible.
Duplicate the new text (Layer > Duplicate Layer) and move it under the top text layer.
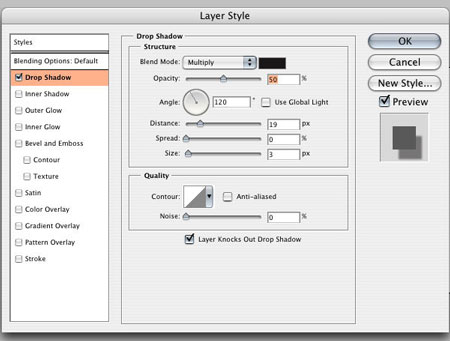
We need to create two lights, and this text layer will contain the first light. Add a Layer Style Shadow(Layer - Layer Styles - Shadow) (Layer> Layer Style> Drop Shadow). Set the settings as in the screenshot and turn off the Use Global Light checkbox. This option sets the shadow and emboss to the same angle, but we need two different sources.
Note: Both light sources should be above the original text layer.
Step 4
Apply a layer style to the top text layer Shadow(Layer - Layer Styles - Shadow) (Layer> Layer Style> Drop Shadow):

Step 5
Now let's add embossing to create a metallic effect. Layer - Layer Styles - Emboss(Layer > Layer Style > Bevel and Emboss).

Step 6
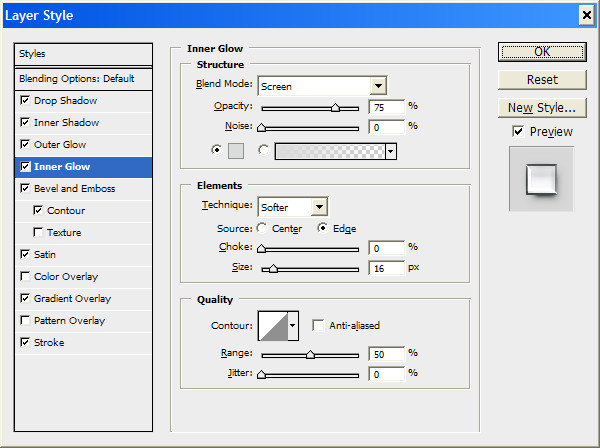
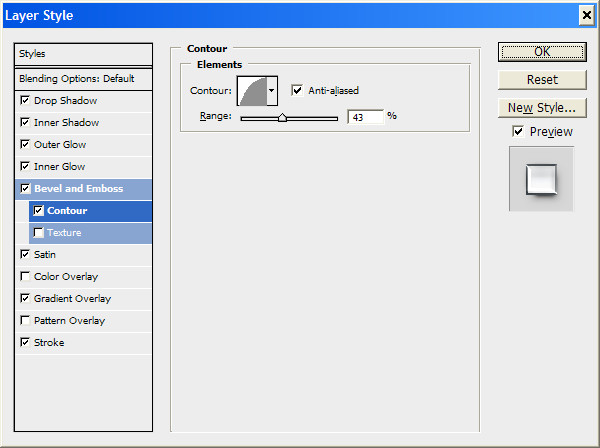
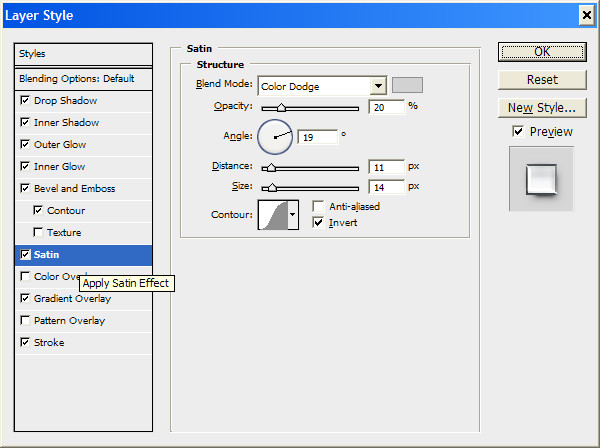
Now let's add a layer style Gloss(Layer - Layer Styles - Gloss) (Layer> Layer Style> Satin):
![]()
Step 7
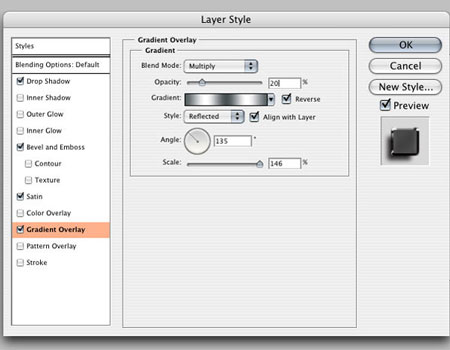
The last layer style, Gradient overlay, will darken the text and help add a light reflection (Layer - Layer Styles - Gradient Overlay) (Layer > Layer Style > Gradient Overlay).
Step 8
We need to add a metallic texture to the text. With the top layer active, enter the menu Load Selection(Selection - Load selected area) (Select > Load Selection).
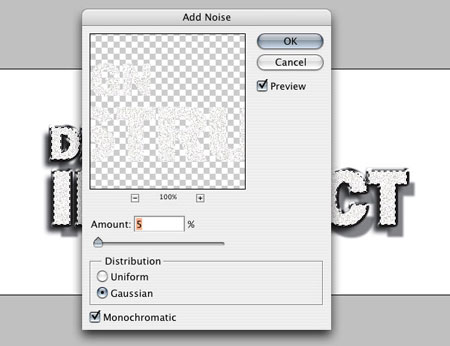
Create a new layer(Layer - New - Layer) (Layer> New Layer) ( Shift +Ctrl +N) and fill the selection with white. Now apply it to it filter Noise(Filter - Noise - Add Noise) (Filter > Noise > Add Noise).
Step 9
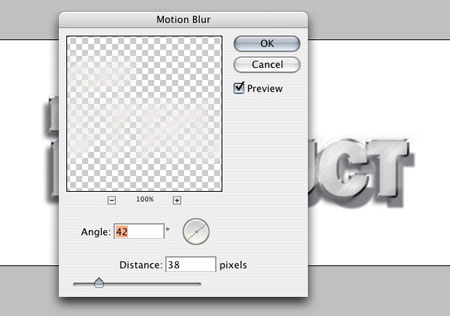
Deselect (Select - Deselect) (Select > Deselect) ( Ctrl+D) and apply the Motion Blur filter (Filter > Blur > Motion Blur).
Select the first text layer and load a selection area Selection - Load Selection(Select > Load Selection). Now invert the selection (Select > Inverse) ( Shift + Ctrl + I). Delete the selected area. This will get rid of the noise that was outside the text. Change the blending mode to Multiplication(Multiply).
The action is ready. Click the stop button at the bottom of the Actions palette.
Step 10
Open the wall texture, drag it into the image and place it below all layers.

Step 11
Let's add texture to the text. Open an image of an old film and transfer it to our document. Place the old film texture above all layers and reduce it to 30% ( Editing - Free Transform) (Edit > Free Transform) ( Ctrl+T) to fit the document size. Change the film texture blending mode to Overlay.
Step 12
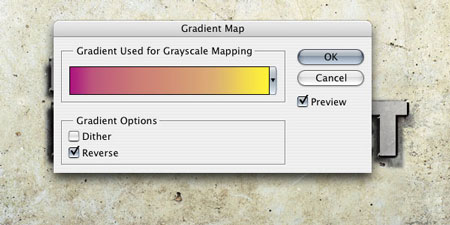
Now let's add a warm color tone to the image. Let's do this through an adjustment layer. Gradient map(Layer - New Adjustment Layer - Gradient Map) (Layer> New Adjustment Layer> Gradient Map). Create a gradient from yellow to magenta and enable the checkbox Inversion(reverse). Change the blending mode of this adjustment layer to Overlap(Overlay) and reduce the opacity to 30%.
Step 13
Now let's darken the edges of the image. Tool Rectangular areadischarge(Rectangular Marquee Tool) ( M) draw a selection and feather it by 50 pixels ( Shift + F6). Create a new layer (Layer - New Layer) (Layer> New Layer) ( Shift +Ctrl +N). Invert selection ( Selection - Inversion) (Select > Inverse) ( Shift + Ctrl + I) and fill the selection on a new layer with black. Change the blending mode of this layer to Color Burn.
Step 14
Using a tool Brush(Brush Tool) ( B) add a glow to the text. Set the brush size to 20 px and Hardness to 0%. Create a new layer ( Shift + Ctr + N) and place it under the film texture layer. Select the color white (#FFFFFF) and add light dots to the edges of the letters. Change the blending mode of this layer to Soft light(Soft Light).
Step 15
Merge image ( Layer - Flatten) (Layer > Flatten Image). Duplicate the resulting layer (Layer - Create a duplicate) (Layer> Duplicate Layer). Apply a filter to the duplicate Colour contrast to sharpen the sharpness a little (Filter - Other - Color Contrast) (Filter > Other > High Pass). Set the radius to 10 px. Change the blending mode of this layer to Darkening the base(Color Burn) and reduce the opacity to 30%. Now merge both existing layers into one.

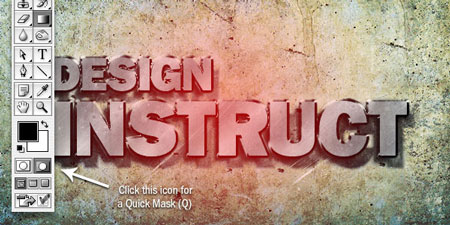
Step 16
Select a tool b(Quick Mask Mode) ( Q) :
Tool Gradient(Gradient Tool) ( G) radial type, draw a circle in the center of the document.
Exit mode Quick mask (Q) and invert the selection ( Selection - Inversion) (Select > Inverse) ( Shift + Ctrl + I).
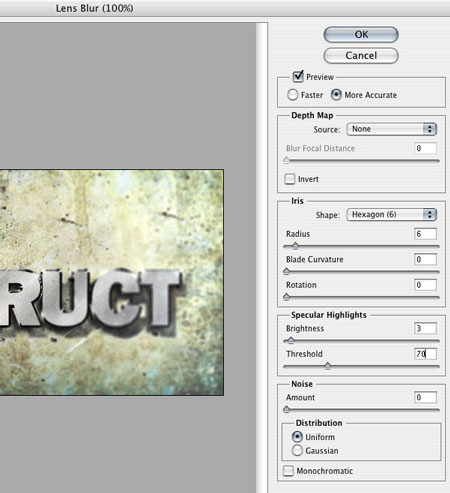
Step 17
Finally, let's add a filter Shallow depth of field blur(Filter - Blur - Shallow depth of field blur) (Filter > Blur > Lens Blur):
In this tutorial we will learn how to create a metallic effect in Adobe Photoshop. This is a very quick lesson and won't take you much time. But in the future, you will have equipment in your arsenal that will certainly help you in working on various projects. The lesson is described in sufficient detail, so it is quite suitable for beginners. To run it, you will need CS3 or newer version of the program.
Result

Step 1
Open Photoshop and create a new document. In our example, the document size is 800 x 480 px.

Step 2
Take the Gradient tool ( G) and set up the gradient as shown in the first image below. Use colors #a4a2a3 And #d2d2d2. Fill the background horizontally as in the second image below.


Step 3
Create a new layer ( Shift+Ctrl+N) and fill it with color #d2d2d2 using the Paint Bucket tool ( G).
From the menu, select Filter > Noise > Add Noise/Filter>Noise>Add noise, specify the amount of noise at 400%, select the Distribution type and enable the Monochromatic option.
Now from the menu select Filter > Blur > Motion Blur / Filter> Blur> Motion Blur. Set the Angle values to “0” and Distance to 40 px. Click OK.


Step 4
Make sure the texture layer is active and select Layer > Layer Mask > Reveal All/Layer>Layer mask>Show all. Change the first color to black ( #000000 ) and take a large shaded tool brush Brush (B). Lower the brush opacity to 65-70% and paint in the mask in the left and right corners.
Set the layer to Blending Mode Overlay and reduce Opacity to 60% .


Step 5
Create another layer and fill it with color #d2d2d2. From the menu, select Filter > Noise > Add Noise/Filter>Noise>Add noise. Set the amount of noise to 10%, Distribution/Gaussian/Gaussian and enable Monochromatic/Monochrome effect. Change the layer blend mode to Linear Burn and reduce the Opacity to 10% .

Step 6
From the menu, select Layer > New Adjustment Layer > Curves/Layer> New Adjustment Layer> Curves. Set up the curves as shown in the image below.

Result
That's all. A simple and quick metal texture effect is ready. To achieve different effects, change the direction of the gradient in the background layer.
Translation – Duty room
Note: In drawing in the style of "realism" the main thing is to achieve realism in the final image.
You need to know some tricks - how to draw this or that object, what characteristics of it can help bring it to life in the drawing?
In this lesson you will learn how to draw metal texture and metal objects(using the example of a knight in armor with a sword), arrange the light correctly and do not forget about the reflection.
Before you start painting, it doesn’t matter what style or genre you are going to do it in, you just need to know the basic characteristics of light, material and how they interact with each other. In general, this topic is quite sensitive, but I will still try to describe in general terms what lies behind it. When you imagine this interaction, it becomes much easier to give your image the effect you want. In this tutorial I'll tell you specifically about metal, but once you understand the concept, you can apply this knowledge to any material you want to draw.
In the pictures below you can see the workflow of one of my images called "Executioner". He wears solid armor and has two light sources around him. The main source is bright white light, and the second is medium, with a turquoise tint. Take a closer look at the painting steps of this piece and you'll see that adding a reflection to the metal makes the picture more realistic with each step. Don't be afraid to experiment with your images. If you draw digitally, experimenting is easy.
Drawing process "Executioner"

Click on the picture to view the image in full size and 100% quality.
I used this regular round brush to paint 90% of this work. Reduce the value slightly hardness to make transitions smoother.

Click on the picture to view the image in full size and 100% quality.
When drawing metal, the most important thing is to remember light And reflection. Any type of metal reflects light. The degree of reflection depends only on the surface texture. The less texture, the greater the reflection, and vice versa. On some surfaces, the texture can only be seen with a magnifying glass. These small details are distinctive feature different materials. Also remember that light and color are reflected from other surfaces.


Some light is lost when reflected from textured surface. Even the smallest elements around us always reflect some part of the light. Without this reflection, we simply would not be able to see anything.
Besides the surface, there is one more thing that should not be forgotten. This molecular structure of materials. The denser the molecular structure, the harder the material. Let's compare several materials and imagine them in reality. It's something like mathematics (which I admit I hate) and geometry. You need to calculate the angle and strength of the light reflected and multiply this by the exponential of the surface from which it is reflected. Usually artists do this almost without thinking, they determine everything “by eye,” so to speak. Software 3D uses the same logic, calculating all these quantities. The more rays of light there are in the image, the more realistic it will turn out in the end.

As you can see, soft materials have a lower molecular density, and vice versa, hard materials have a higher molecular density.
Therefore they wear out faster. Just think about the objects around you and you will understand why this or that material is used for this or that object.
For example:
Jam: with its fairly sparse molecular distribution, it is very easy to chew and digest. Sometimes you don’t even need to chew and swallow it.
Steel: These guys are the scapegoats of all things hard. In the heat of battle, this material is the most reliable. Just put on your armor and you won't be afraid of any enemies. But not if they have a sword made of better quality steel, in this case a denser steel, or titanium.
Tree: It is easy to acquire (at least it used to be so), easy to give the necessary shape, a living material that gives you a feeling of comfort, since you, being a person, and it, being a plant, have a mystical connection since the time of the Tree of Knowledge and Adam and Eve. The wood is light enough to be carried by a person and hard enough to be used to create objects that will be used for years.
Working with color requires a lot of practice, as do anatomy, composition and perspective. So I advise everyone to get acquainted with the theory of working with color. And this doesn’t just apply to beginners! This is necessary, for example, so that you can better understand what suits you in terms of clothing or figure out what hair color will suit you and what will not. For me, the process of choosing colors is the most interesting thing in drawing.

Before you start your drawing, select the colors you need (this is why you need to study color theory!) and create a separate layer for them (make your own palette). Reduce the pressure and opacity of the brush a little. If you're using a tablet, select one of its buttons for the tool eye-dropper tool. Draw first one part of your drawing, then the second, but do not use the tool Smudge tool!!! Only if you are absolutely sure of what you are doing, you can try.

Now apply the tool eye-dropper tool in the field of combining two colors. Repeat the mixing process until the color transition looks quite soft. When you're painting on a surface like leather, use a soft-edged round brush to make the blending even softer.
Another good example is snow. Imagine any surface covered with snow. She's very soft, isn't she. Now imagine taking snow in your hand and crushing it. We will get a snowball so hard that it can break glass.
A material with a higher density always penetrates one with a lower density. For example, a diamond can cut steel. Steel or iron can cut wood, or even your finger. Or here’s another thing: a tree cuts water. Imagine throwing a wooden ax into a pool full of water. Despite all this splashing and everything else, in fact, the tree really cuts through the water. Although I think a separate lesson should be devoted to water.
Thanks for your attention, friends!
Reading time: 5 minutes Images: 19
Dear friends, today we are watching a new Photoshop lesson. I called this lesson . Today's lesson, like the previous ones, is very simple. To get a similar effect, we only use styles for text. I really love experimenting with styles. This is a very powerful tool with which you can achieve amazing results. Sometimes the result is amazing, but the effects are minimal. Styles give great freedom to creativity. In this lesson we will also use the blur tool, but we will try to achieve the main effect only with styles. So let's see.
First, as always, we will select a suitable background on which the effect will look much better than on a white or black background.
The right background allows the effect to appear quite realistic. Because today we want to get Polished Metal Text Effect in Photoshop, then, accordingly, we use any suitable texture. I chose concrete. Maybe because it's light. So, let's create a new document ( Ctrl+N) and opening the photo with our texture, drag it onto a new layer of our document. When you drag a photo, it will automatically be inserted into a new layer.
Now, by selecting the text tool ( T) and by clicking in the center of the work area, write the text we need.
Now it’s tedious to make a double of this sly from the lyrics. To do this, click the left mouse button, and while holding the key, drag this layer according to the following image:
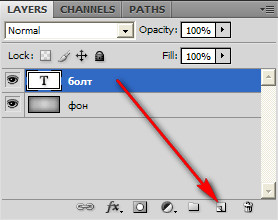
We get a new layer completely identical to the original. And holding it, we lower it down.
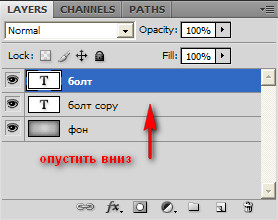
Well, half the job is done. It is advisable to choose a bolder font for this lesson. Now we assign a new style to the layer with our text (top layer).


Click on the OK button and look at the result.
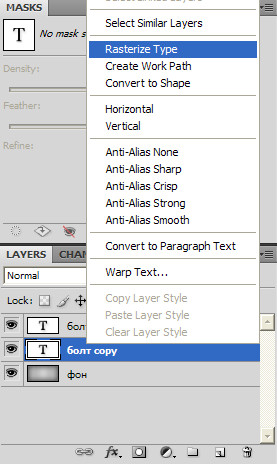
It's a little lacking in realism. What's missing? That's right, shadows. Let's add a shadow. For this, you just need a duplicate text layer. Select the duplicated layer, below the main one, and with the right mouse button select Rasterize Type.
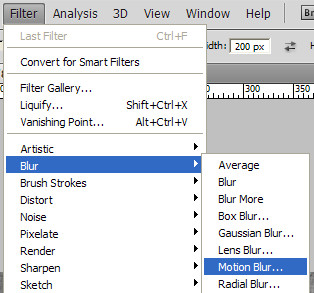
Now select the layer blur.
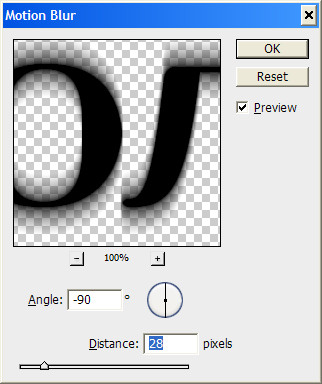
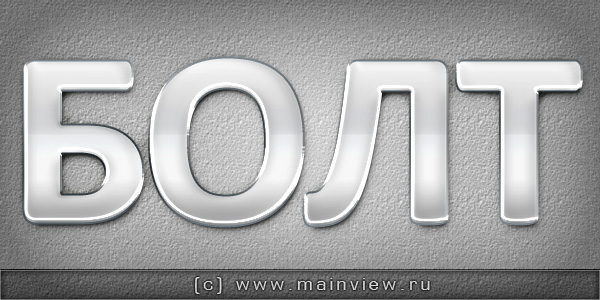
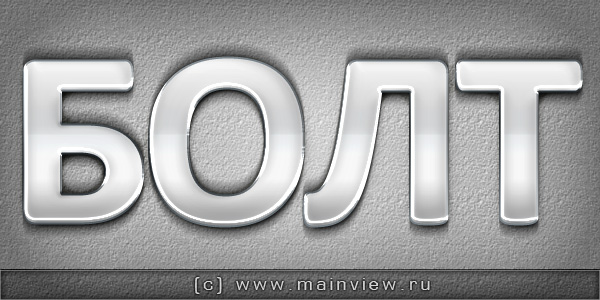
Press the button OK and enjoy the result. If you did everything correctly, then you should get the following result, which I called Polished Metal Text Effect in Photoshop.
That's our Photoshop lesson finished, thanks for your attention!