Understanding the electrical components of the home
And now you are already looking at laminate flooring, consulting with a designer about tiles for the bathroom and thinking about whether to change all the electrical components. Let's leave the tiles and laminate alone for now and go in order - let's start with the electrical component of the home.
15 years ago: What you need to know about electrical wiring
If you live in a relatively new house, you don’t have to worry too much: the wiring here is planned and laid out taking into account the needs of a modern person. In new buildings, even at the design stage, it is often taken into account that powerful household appliances will be installed in the kitchen, and one outlet is not enough.  The housing, which is more than 10-15 years old, was built according to old projects preserved from Soviet times. By these standards, there were two electrical outlets per room. Well, really, what was so powerful electric in the apartments of our fathers and mothers? A washing machine, which was turned on on weekends, a TV and a refrigerator. Accordingly, all electrical wiring in those apartments was designed only for lighting and household appliances were not high power.
 In the nineties and two thousand, the situation changed radically - technology became available to everyone. And it was at this time that the number of fires and fires sharply increased due to the fact that the wiring was burning and could not withstand the heavy load. Therefore, if you have already started a redevelopment or repair, do not be lazy and replace the old cables with new ones of a larger cross-section, or even copper ones - they are better and can withstand heavy loads, although they are more expensive.
Sockets: where to put and how much to take?
 First, sit down and together with the designer think about how many sockets you need to be happy. As a rule, such questions somehow fall out, get lost in the general list of what needs to be done. And after renovation, the apartment suddenly becomes overgrown with electrical extension cords, and even extension cords plugged into extension cords with splitters. Draw a floor plan of the apartment along with the arranged furniture and household appliances. Think about where it would be convenient for you to connect this or that electrical appliance. Determine the height of the outlets and their distance from walls and windows. But first things first: let's go through the rooms, from the hallway to the toilet, and think together about how best to place the sockets.
 Corridor and hallway
 In the corridor or hallway, two or three pieces will be enough. Most often they are used to turn on a shoe dryer. Therefore, do not raise the connectors too high. Of course, there is no need to hide them behind a hanger or behind the door; it is best to place them in the corners. It is better to turn on wall lamps directly, through a separate switch connected to the mains.
 Living room
 This is the room in which the family spends most of their time when they are at home. Here, as a rule, there is a TV, a cable or satellite TV set-top box, a media center or some other audio-video equipment, such as game consoles for children. Often in the living room there is a base for a landline telephone handset and a wi-fi router. There are already five or six points. Plus, you need to leave a couple of free connectors just in case: charge your mobile phone, turn on your laptop. You never know!
 1. Sofa area

To correctly place sockets, along with planning the electrical network, you need to immediately think about the placement of furniture in the room. Otherwise, it will turn out that they are located behind the sofa or closet. Most of electrical appliances in the living room are always turned on, for example, air conditioning, TV, set-top boxes, router, telephone. Sockets for them can be obscured by a chair or, for example, a decorative flowerpot. Free points must be easily accessible.
2. TV zone

If the sockets for all electronic gadgets in the living room can be left at a level of 30 cm from the floor, then the socket for a TV hanging on the wall or an air conditioner requires a separate approach. In this case, provide a place directly behind the TV screen or near the air conditioner so that hanging wires do not spoil the picture.
Bedroom
 What to do in the bedroom? Sleep? Certainly. But there is technology here too, so it’s worth figuring out in advance where to place the sockets in the room.
 1. Sleeping place

If your bedroom has a classic format with a double bed and bedside tables at the edges, it would be nice to have two points near each of them: connect a night light and charge your mobile phone or tablet. The same number of connectors is needed for two separate beds. If the bedroom also has a dressing table, then there should certainly be sockets near it, preferably two or three. Turn on the hairdryer, for example.
2. TV zone

A TV in the bedroom is a common sight. Most often it is hung on the wall so that it is convenient to watch it while lying on the bed. Therefore, a point is needed for it too. The principle of its installation is the same as for a hanging TV in the living room - behind the screen. The air conditioner in the bedroom requires another outlet, which must be installed at the top, next to where the air conditioner is installed. Remember those ugly hanging wires? Just the same case.
Children's
1. Sleeping place

The children's room is the same bedroom, only for younger family members. While they are very small, they do not need many electrical appliances: a night light by the crib is quite enough.
2. Play area

But later, your offspring will need additional places to charge: for gaming gadgets, personal computer and computer peripherals, game consoles. Two laid on building regulations obviously not enough, especially if the child is not alone. Connectors in the nursery are often made “safe”, that is, with special covers and plugs that the baby cannot pull out on his own. If the child is small, it makes sense to install just these. And no dangling wires for a child to pull on!
3. Workplace


It is also necessary to consider the number of sockets in the space that you plan to allocate under your desk. All computer equipment and table lighting require one point for each piece of equipment. And, as always, one more in reserve.
Kitchen

In count electrical appliances per unit area, the kitchen will give a head start to any room. Let's just count: refrigerator, electric stove or gas stove, but with electric ignition, oven, hood over the stove, microwave, electric kettle. And these are only those devices that are constantly connected to the network. Plus, a washing machine and dishwasher can live in the kitchen.  In addition to them, there is also a mixer, blender, coffee grinder and coffee maker, electric meat grinder and juicer, pancake maker, sandwich maker and a bunch of all sorts of appliances that are taken out and turned on regularly. Let’s count again: for those who are always on, it’s eight, and at least five is needed “just in case.” Therefore, the question of how to properly place rosettes in the kitchen has its own technical nuances.
1. Household appliances

Connectors for the refrigerator and stove can be located directly behind them: how often do we rearrange our kitchen? Turned it on and forgot it. If your microwave is on the refrigerator, and this often happens, its point is there - behind the refrigerator. The same applies to the washing machine and dishwasher: the connectors for them, as a rule, are hidden behind the kitchen unit. Many people do not know where to place the outlet for the always-on hood. In our opinion, the most suitable place is under the ceiling. If you are going to use an electric stove and an electric oven, they will need separate, thicker gauge wiring.
2. Additional equipment

It is convenient to plug small and infrequently used equipment into the connectors located above the worktop. It is convenient to use two groups of three: many designers offer their clients exactly this arrangement. Another option is to build them into the countertop.
Bathroom and toilet
 In houses that were built more than thirty years ago, such electrical communications in the bathroom and toilet were not provided at all. People had never even heard of such miracles as a Jacuzzi or a shower stall, so no one asked themselves the question of how to place sockets in the bathroom. Some craftsmen independently pulled wires into the bathroom, attached connectors into which they plugged in an electric razor "Kharkov" or hairdryer Today everyone knows about these miracles, they are all accessible and pleasant. Therefore, when designing a bathroom, you need to immediately look at places for sockets.
 Important:
- All switches and other electrical equipment must comply with the standard for electrical equipment for wet rooms (protection class not less than IP44) and be reliably grounded. The designer or planner should definitely tell you about this The socket for the jacuzzi and shower can be installed behind their decorative walls; you will not constantly turn these units on and off. The socket for the exhaust fan can be installed at the top, next to it, although most often the exhaust fan is connected to the lighting system: turn on the light - the fan hums Nearby The bathroom mirror, which usually hangs above the washbasin, can be mounted with one or two points. One can be used to power the lamps above the mirror, the second - for a hair dryer, razor and other small appliances. Naturally, we remember about the protection class and grounding
- If the dimensions of the bathroom allow you to install a washing machine, remember that the connector for it is located at a distance of at least 50-60 cm from water pipes
And further...
 All this, of course, at first glance is understandable and seems to be uncomplicated. It seems like you can handle it yourself. And it’s true: buy a screwdriver, pliers, a couple of rolls of cable, and your new homemade electrician is ready. You can google a couple more articles on the topic “how to plug in sockets correctly.” Draw a diagram and plug in all the sockets, saving some money on the designer, planner and professional team. But you probably already have an idea of what will come of it. By the way, phone fire service 101.
Electricity is a serious and responsible matter. If you are going to do all the work yourself, you need to do everything very carefully and diligently. Correct wiring Electrical wiring in a private home is a guarantee of safety, because according to statistics, 70% of fires occur due to electrical faults. If you are not confident in your abilities, it is better to entrust the work to proven specialists.
Action plan
Electrical wiring in a private house is done before finishing works. The frame of the house is out, the walls and roof are ready - it's time to start work. The sequence of actions is as follows:
- Determination of input type - single-phase (220 V) or three-phase (380 V).
- Development of a scheme, calculation of the capacity of the planned equipment, submission of documents and receipt of the project. Here it must be said that the technical specifications will not always determine your declared power; most likely they will allocate no more than 5 kW.
- Selection of components and components, purchase of meters, machines, cables, etc.
- . Performed by a specialized organization, you need to decide on the type - overhead or underground, install it in in the right place automatic input and counter.
- Install electricity into the house.
- Laying cables inside the house, connecting sockets and switches.
- Ground loop design and its connection.
- Testing the system and obtaining a certificate.
- Electrical connection and operation.
This is only a general plan; each case has its own nuances and features, but you need to start by obtaining the technical conditions for connecting to the electrical network and the project. To do this, you need to decide on the type of input and the planned power consumption. It must be remembered that the preparation of documents can take six months, so it is better to submit them even before the start of construction: two years are given to fulfill the technical conditions. During this time, you will probably be able to build a wall on which you can put a machine and a counter.
How many phases
IN a private house Single-phase voltage (220 V) or three-phase (380 V) can be supplied. According to energy consumption standards for a private house at single-phase network the maximum consumption per house can be 10-15 kW, for three-phase - 15 kW.

So what's the difference? In that in three-phase network You can directly turn on powerful electrical appliances - electric stoves or heating boilers, ovens and similar equipment. However, the input requirements and wiring of the 380V network are much stricter: higher voltage, greater chance of serious injury. Therefore, if your house is no more than 100 square meters, and you do not think of heating it with electricity, you are better off using 220 V.
Making a plan and receiving a project
Having decided on the type of input, you can begin to develop a plan for electrifying your home. Take a scale plan of the house, and draw where the equipment will be located, figure out where to place the sockets and switches. In this case, you need to take into account where any large-sized furniture will be located, and where it can be rearranged, so that sockets and switches are not placed in these areas.
All lighting fixtures will need to be drawn on the plan: chandeliers, sconces, floor lamps, lamps. Some of them will need switches, some will need sockets. Then you will need to figure out which devices in each room will need to be turned on. For example, in the kitchen there is a lot of equipment that works constantly. It definitely needs sockets. There is also equipment that turns on periodically. All this is plotted on the plan, determined optimal location switching points. The same approach applies to each of the rooms.

Determination of total power
Having decided approximately what equipment will be installed in your home, add up its power. The average power can be taken from the table: there is probably no technology yet. Moreover, where there are, take into account starting loads (they are much higher). Add about 20% of the reserve to the found amount. The result will be the required power. You indicate it in papers submitted to obtain permission to connect electricity to the site. If you are given the stated power, you will be very lucky, but you should not hope for it. Most likely, you will have to invest in the standard 5 kW - the most common electricity limit for a private home.

Breakdown of consumers into groups
All these consumers (this is the term of professionals) - lamps, spotlights, switches, sockets - are divided into groups. A separate branch runs electrics to lighting fixtures. Usually one is enough, but this is not a rule; it may be more convenient or expedient to make two branches - for each wing of the house or for each floor - depending on the type and configuration of the building. The lighting of the basement, utility rooms, as well as the light on the street stands out in a separate group.
Then the sockets are divided into groups. How many you can “put” on one wire depends on the diameter of the wire used, but not very much - three to five, no more. It is better to allocate a separate power supply line for connecting each powerful device: this is more reliable from the point of view fire safety, and will contribute to more long service life devices.
As a result, you may have three to seven lines running into the kitchen - this is where the equipment is most abundant and also powerful: for an electric boiler and electric stove, separate lines are absolutely necessary. It is better to “plant” the refrigerator, microwave, electric oven, and washing machine separately. Not so powerful blender, food processor etc. can be included in one line.

There are usually two to four lines going into the rooms: in a modern home and in any room there is something to plug into the electrical network. One line will go to lighting. On the second there will be sockets into which you will need to plug in your computer, router, TV, and phone charger. All of them are not very powerful and can be combined into one group. If you intend to install an air conditioner or turn on an electric heater, you will need separate lines.
If a private house is small - a dacha, for example, then there may be two or three groups: one for all lighting fixtures, the second for the street and the third for all internal sockets. In general, the number of groups is an individual matter and depends most of all on the size of the house and the amount of electrical equipment in it.

Based on the number of groups received, the number of machines on the distribution panel in the house is determined: to the received number of groups, add two to four for development (suddenly you forgot something important, or you need to turn on something new powerful, divide a group that is too large or far apart into two, etc.). The number of machines in it is also selected based on the number of groups: there is a separate machine for each group. If a private house is large - on several floors, it makes sense to install more powerful machines on each floor, and connect group machines to them.
Where to put the shield
The installation location of the electrical panel is not regulated by regulations. There are only restrictions regarding the distance from the pipelines; it must be at a distance of at least 1 meter. Any pipes are taken into account: water supply, heating, sewerage, internal drains, gas pipelines and even gas meters.
There are no restrictions on premises. Many people place the panel in: since it’s a technical room, it makes sense to collect all communications here. The receiving authorities do not make any claims. Sometimes it is more convenient to place the shield near front door. If the protection class meets the requirements, there should be no claims.
Selection of cables and components
Today's standard wiring diagram for a private house includes two circuit breakers. One - input - is installed before the meter, usually on the street. It and the meter are sealed upon commissioning. The second RCD machine is placed in the house in front of the panel. The operation (shutdown) current of these devices is selected so that the circuit breaker installed in the house is turned off first (its current value is slightly less). Then, in the event of an emergency, you will not need to crawl under the roof.

If design load less than 15 kW the circuit is standard - RCD + automatic, meter and then division into groups. For higher power consumption, it will be necessary to install a transformer; its parameters and the parameters of all equipment will be indicated in the project.
IN Lately when connecting a private house to the power grid, they are required to install a meter and a machine on the street. This requirement is not supported by law; it is simply easier for the electricity service to control consumption. If you want, you can fight, if not, choose a meter and machine in a case with increased dust and moisture protection - a protection class of at least IP-55. For installation inside a building, the protection must be less - IP-44, and accordingly the price will be lower.
Cable selection
For electrical wiring in a private home, it is better to use cables rather than wires. Their insulation is at least twice as good, therefore the laying requirements are not so stringent, and they are safer to use. All internal wiring in a private house must be done with. Previously, there were no such requirements, but now many electrical appliances have three-pin plugs and require grounding for safe operation. Therefore, the cable must be three-core.
In electrical cables, the cores are made of copper or aluminum. Although aluminum is cheaper, it is used less often: it is rigid, more likely to break, and more difficult to work with. At self-wiring wiring in a private home and lack of experience, this can become a problem. In addition, it cannot be used inside wooden houses at all.
Determination of core cross-section
Once you have decided on the material, you can select the diameter of the cable cores. This is done depending on the planned load on the line according to the table.

Calculation of electrical wiring - the selection of the cross-section of the cable cores is carried out according to this table
The cross-section of the core is selected according to the current or power of all consumers connected to one circuit breaker. This is where your home electrification plan, where you have outlined consumer groups, will come in handy once again. You calculate the sum of the currents or powers of all devices and select the desired cross-section of the cores according to the table.
How to use the table? If you decide to lay copper wires, the input voltage is 220 V, then the left part, the corresponding column, is suitable for internal wiring. The found power of all consumers connected to the group will be compared (it is easier to find and calculate). In the part where we talk about copper wires, placed in trays, voids, channels, in the “220 V” column, find the nearest higher value. Follow this line to the right to the column “Section, sq. mm". The number indicated here will be the required core size. From conductors of this diameter it will be necessary to make electrical wiring from the machine to sockets or switches.
In order not to get confused when counting and laying, designate wires of the same diameter on the plan with a certain color (write it down so as not to forget what color you designated what). After the diameter has been determined for all consumer groups, the length of the required cables for each size is calculated, and a margin of 20-25% is added to the found figures. You have calculated the wiring for your home.
Shell type selection
There are certain requirements for the type of sheath only when laying electrical wiring in wooden houses: it is recommended to use triple (NYM) or double () cable insulation. In houses of less flammable materials, any insulation can be used. The main thing is that it is intact, without cracks, sagging or other damage. If you want to play it safe, you can use conductors with enhanced protection. This makes sense in rooms with high humidity(kitchen, bathroom, swimming pool, sauna, etc.).
Selection of sockets and switches
For some powerful devices, sockets are selected according to the maximum (starting) current. For other low-power consumers they are standard. You need to know that they exist:
- External - when the body sticks out from the wall. They are easier to install: a backing is attached to the wall, and a socket is attached to it on top. But few people use such models now, even at their dachas. The reason is aesthetic: not the most attractive sight.
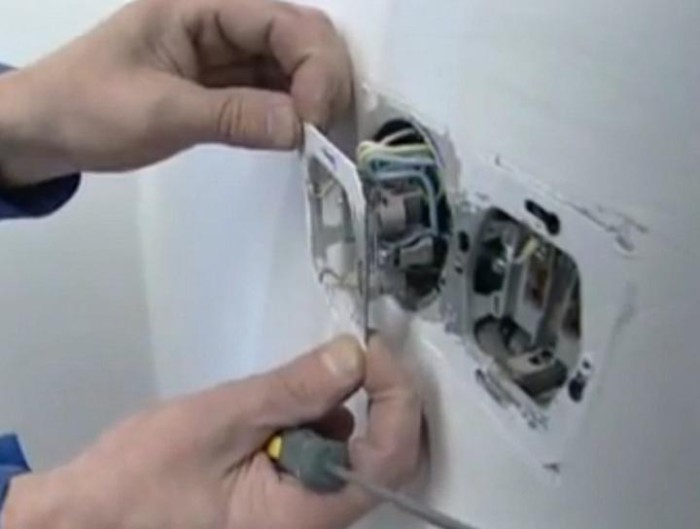
- Internal. A recess is made in the wall for the electrical part, and an installation box is installed and walled up in it. The electrical part of the socket or switch is inserted inside this box.
It is indoor electrical sockets and switches that are most often used today. They are decorated in different styles and painted in different colors. They are selected mainly to match the finish, and if this is not possible, they are installed in white.
Read how to connect pass-through switches (turn on/off lights from two or more places).
DIY wiring
Modern construction trends provide for hidden wiring. It can be laid in specially made grooves in the walls - grooves. After laying and securing the cables, they are covered with putty, comparing them with the surface of the rest of the wall. If the erected walls will then be covered sheet materials- plasterboard, gypsum plasterboard, etc., then grooves are not needed. The cables are laid in the gap between the wall and the finish, but in this case - only in corrugated sleeves. The shell with laid cables is attached with clamps to the structural elements.

When laying, you need to remember that internal wiring a private home is done according to all the rules and recommendations. This is the only way to guarantee safety. The basic rules are:
- laying wiring only vertically and horizontally, no rounded corners or beveled routes;
- all connections must be made in ;
- horizontal transitions must be at a height of at least 2.5 meters, from which the cable runs down to the socket or switch.
A detailed route plan, similar to the one in the photo above, must be saved. It will come in handy during repairs or wiring upgrades. You will need to check with him if somewhere nearby you need to ditch or make a hole or hammer a nail. The main task is not to get caught in the cable.
A large percentage of electrical wiring problems come from poor wire connections. They can be done in several ways:

Still, the most reliable connection methods are welding and soldering. If it is possible to make the connection like this, you can assume that you will not have problems. At least with connections.
Installing electrical wiring in a house with your own hands requires careful fulfillment of all requirements. This is a guarantee of your privacy and the safety of your private property.
After the wires from the machine to the connection point of the socket or switch are laid, they are checked for integrity with a tester - the wires are connected to each other, checking the integrity of the conductors, and each individually to the ground - checking that the insulation is not damaged anywhere. If the cable is not damaged, proceed with the installation of the socket or switch. Once connected, everything is checked again with a tester. Then they can be started on the appropriate machine. Moreover, it is advisable to sign the machine immediately: it will be easier to navigate.
After finishing the electrical wiring throughout the house and checking everything yourself, they call electrical laboratory specialists. They check the condition of the conductors and insulation, measure grounding and zero, and based on the results they give you a test report (protocol). Without it you will not be given permission to put into operation.
One of the most important parts of a room renovation is correct placement electrical wiring. When drawing up a layout of sockets, you need to take into account such important aspects as the size of the room, the total number of all switches and sockets and, of course, how the furniture is arranged.
Rules for placing electrical wiring
There are no strict restrictions. However, there are some requirements for installing sockets, for example, in the bathroom or in industrial premises. There are also recommendations for installing switches and sockets in an apartment, but whether to adhere to them or not is purely a matter of your needs and tastes.

In the Soviet Union (during the time of old traditions), it was believed that the socket should be at a distance of 90 cm from the floor, and the switch should be at a distance of 160 cm (1.6 m).

Such standards created ease of use, since in order to reach the level of the switch, there was no need to bend down or sit down. Thanks to this, even now many people adhere to just such rules.

New traditions - European standard
Along with the definition of “European-quality renovation”, such a term as “European standard” for the location of sockets came to us from nearby countries. What does the European standard imply? These rules in no way limit the height of the room or total number switches and sockets in the home, but only helps to recommend The right way installation in hazardous areas taking into account safety measures.

In accordance with European standards, sockets and switches should be placed as follows:

The switch is at a distance of 90 cm from the floor (if you notice, according to old traditions this was a place for an outlet, but according to people of the current generation, in this way you can turn off or turn on the light without raising your hand).

The socket is now located at a distance of 30 cm from the floor, which allows you to conveniently hide wires that you would like to hide from prying eyes.

In all the photos that are presented in the text and in our gallery at the end, you can see how the location of the sockets differs before and now.

Remember that the diameter of the pins of European sockets is much larger than the diameter of the pins of domestic sockets, and the strength of the received current is approximately 10 to 16 A, while for Russian ones it is only 10 A.


Therefore, if you want to use devices with higher power, then you should definitely install European sockets indoors.

Planning the installation of sockets and switches in the room
Any room is laid out in its own way, which means that for each room you need to select options for the location of electrical installations.

Corridor
Each apartment has a small hallway, where switches also need to be placed correctly, since this is the room that a person enters first. Usually in a corridor two or three sockets are considered necessary.

It will also be useful to place in the hallway distribution board, switch (or block of switches), electric meter and so on.

Kitchen
The outlet for the hood should be located at a level of 2 meters from the floor.

Sockets for connecting a washing machine, dishwasher and it is better to place the refrigerator 10-20 cm from the floor level. For household appliances If you have a not very long wire, you can make a socket in about 50 cm.


To place small items (for example, a toaster), the socket should be 110 cm above the floor level (or at a distance of 20 cm from the level of the kitchen countertop).

Lighting fixtures occupy an electrical outlet located approximately 5-10 cm above the furniture.


Attention! The power of all electrical lines in the kitchen should be less than the required norm, as this will allow all points of energy consumption to be activated at the same time.

Bedroom and living room
It would be best to place an outlet on each side of the bed. The height from the floor is approximately 70 cm, since it is in this position that you can connect, for example, a bedside lamp to the outlet, as well as charge any device.

As for the switch, it should be located at the front door. The location of an additional block of sockets above the desktop (about 30 cm from its level) is also welcome.


In the living room or hall you will definitely need a small number of sockets 130 cm above the floor. They can be hidden behind the TV. Of course, the presence of a spare socket is also assumed. The switch, as in the bedroom, should be near the front door.


Bathroom and toilet
It's no secret that a bathroom is a room with high air humidity, so all sockets and switches must be designed for such conditions (have a protection level of at least IP44).

It is strictly forbidden to place devices at a distance of less than 60 cm from the bathtub or shower stall, as well as below 15 cm from the floor level (as small floods are possible in such a room).


So, using all the skills of correct placement of sockets and switches in different rooms of the room, you can protect yourself and your loved ones and avoid rewiring in the future.

Photo of the location of the sockets


Installing new electrical wiring yourself requires a competent approach and accuracy. Before starting direct installation, a wiring diagram is drawn. In a private home, this is especially important, since installation errors can lead to a fire hazard. A drawn power supply diagram will help you quickly and accurately eliminate damage that may occur in the future or upgrade your home network.
Requirements for wiring in a private house
Electrical wiring is carried out in the form of a combination of wires and cables, as well as their fastenings and associated protective elements. It can be installed in both open and closed types. Open type wiring is laid along the surface of walls, ceilings or floors using: cables, rollers, hoses. Hidden wiring fits in the middle of various elements of the house: under the floor, in the walls, suspended ceilings or in other monolithic objects.
Installing electrical wiring in a private house with your own hands is not difficult at all if there is a clear circuit diagram. At the same time, all work goes much faster and the likelihood of mistakes is less. Before you begin planning and drawing up a diagram, you need to know what the installation requirements are.
The list of requirements is established by special rules of the PES (rules for the operation of electrical installations), which are mandatory. Here's the main list:

Electrical wiring steps
Compliance with all requirements will ensure that the electrical wiring in the house is done correctly with your own hands. The step-by-step scheme for drawing up a plan can be represented in the form of the following operations:
- choice of material and its quantity;
- installation diagram drawing;
- laying and installation of all parts of electrical wiring;
- performance check.
It is not difficult to complete the steps yourself. But before you properly conduct the wiring in the house, you will need to perform preparatory stage. It includes determining the places where connection points for electrical appliances and lamps will be located, and their number.
Selection of materials and installation method
 The utility company supplies electricity through installed lines using poles and poles or through power cables buried in the ground. The cable branches off from the common line to an electrical panel located on private property. The branch is made with a two-wire or three-wire wire. Accordingly, a two-phase or three-phase line is used. More often, a cable containing a phase and a neutral is removed. An electricity meter is installed at the end of this line. It is important to know that the line to the meter belongs entirely to the energy supply company, and it is prohibited to perform any operations with it.
Further laying of the line is carried out by the owner of the household himself or by an electrician. The line itself can be laid open or hidden.
Open type wiring is carried out on the surface in a visible form, which is both a disadvantage and an advantage. The advantage is ease of installation, free access to any part of the electrical network, but the disadvantage is poor protection from mechanical damage. The cable, laid along the surface, is attached through insulators that resemble a fungus. In this case, the design of sockets, switches, and distribution boxes is of an overhead type. To protect against damage and ensure electrical safety, plastic boxes are used. They form a channel into which the cable is laid.
Hidden wiring is located in the completed, and after laying the cable, plastered grooves. Hidden in a floor screed or behind false panels. Electrical accessories are used internally. The wire itself, if not laid in a concrete or brick wall, is laid in a metal hose. The disadvantage is that if the wire is damaged, you will have to remove it from monolithic structures. It is possible to use a combined method, making some areas hidden and others external. The required parts of the electrical wiring in the house will be:
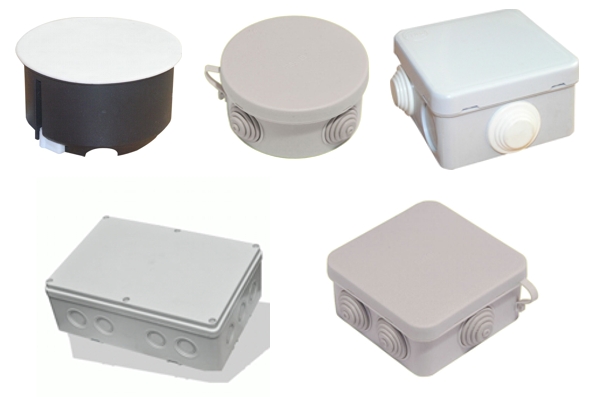
- Switch box.
- Circuit breaker.
- Electrical appliance connection point.
- Switch.
- Junction box.
- Cable.
The electrical panel is installed in such a size that all input elements fit into it. The circuit breaker is designed to quickly break the wire in the event of an emergency on the line. Its main characteristic is the meaning rated current. How many amperes a machine will need in a house is calculated by summing the power of the entire planned load that can be connected simultaneously to the circuit.
When selecting a machine, not only the power of the connected devices is taken into account, but also the quality and cross-section of the installed electrical wiring. A mismatch in the cross-section of the cable that will be used for wiring electricity can lead to overheating, resulting in a short circuit and fire.
The cross-section of a wire is characterized by the amount of current that it passes through itself without deteriorating its electrical properties. For example, copper wire with a cross section of 1.5 mm/2 it can withstand a continuous current load of 19 amperes. Therefore, it is impossible to use a 20 A circuit breaker with such a cross-section; you will need one for 16 A.
The distribution box has the form of a plastic container with a lid, on the sides of which there are holes for cable entry. Its main characteristics are the size and quality of the material it is made of. Switches and sockets are designed for a current that does not exceed the value of the devices connected to them.
Building a circuit
After selecting materials and locating connection points for electrical appliances, a drawing is made electrical diagram. Best to use ready plan house, which depicts all the elements involved in the construction of the electrical network.
To simplify wiring, consumers are divided into groups; this will also help distribute the load and save materials. If a private house has many rooms, then the drawing shows separately the outlet circuits and lighting. The diagram indicates the following:

The cable leaving the meter exits and is switched at the distribution panel. It contains a series automatic protection, consisting of an input circuit breaker and single-pole switches. Ideally, each electrical point is equipped with its own automatic machine, but this is not unprofitable in terms of costs. Therefore, groups are created, each of which has its own fuse.
In the middle of the group, disconnection occurs in the following way. Power wire, leaving the machine, branches out in the distribution box to each electrical point. Such a point represents the place to which the electrical device is switched. In this case, a wire with two or three wires is supplied to the socket, and it is connected in parallel. The switch is installed in series in the break of the power wire.
A wire with three cores implies grounding through one of the three wires. The presence of grounding is important, since there is a potential difference on the metal cases of electrical appliances, for example, on a refrigerator, kettle, heating boiler, etc. This voltage can be life-threatening in the event of an insulation breakdown. Performed grounding eliminates this problem. For this purpose, the socket is equipped with a grounding contact. In fact, this is a continuous connection between the metal parts of electrical appliances and the ground.
Grounding is carried out using a circuit in the form of a triangle, welded from thick metal with equal sides. The grounding loop is located at a distance of no more than 1 meter from the foundation of the house. A large-section wire is screwed to the triangle using a bolt, the other end of which is connected to the grounding strip in the panel.
Cable laying and installation of elements
 After drawing up the diagram and purchasing materials, installation occurs. The main thing is to observe safety precautions and strictly follow the drawn diagram. First, lines are drawn along the surfaces of the walls and ceilings corresponding to the laying of the wire. Then the locations of the electrical accessories are marked. For hidden wiring, the following is done: gating, preparation of recesses for sockets, switches, and space for the panel. For external versions, cable holders are attached at equal distances and holes are made for fastening overhead fittings.
After laying and securing the cable, the shield is assembled. To do this, install on the DIN rail introductory machine and for each group of lines there are automatic switches. If necessary, an RCD is added or a differential circuit breaker is installed instead of the input one. This is a type of switch that simultaneously combines the functions of a circuit breaker and an RCD. A grounding and neutral strip is also installed in the shield.
After installing all the elements in the panel, the wires are connected. It is generally accepted to use brown for the phase wire, blue for neutral and yellow-white for grounding. All connections are made using device clamps. IN distribution box the wires are connected by twisting with further insulation or using clamps in sockets and switches according to their design.
Functionality check
After wiring in the house is done with your own hands or with the help of a specialist, it needs to be checked. To do this, use a multimeter in the dialing mode to check the integrity of the wiring, the absence short circuit in sockets and switches, operability of machines.
Only after a successful check is the input machine connected to the meter terminals to supply electricity to the system. If possible, be sure to turn off the machine in front of the meter when connecting. It should be remembered that 220 volt voltage is dangerous to life and working with it requires clearance and knowledge of protection, so at the final stage it is better to invite an electrician.
It is advisable to carry out electric cable entrust the house to a professional: from the accuracy of compliance with standards and quality of workmanship installation work Not only home comfort depends, but also the safety of people and devices powered by electricity. However, if you have basic knowledge in the field of electrical engineering, then installing wiring in a private home with your own hands is within your capabilities.
Important!
Even before preparing for the construction of the house wiring, the location for the distribution panel is determined. It must be installed in a winter-free room with a distance of at least 1.5 meters from the ground/floor. With the help of a switchboard, the electrical circuit inside the house is controlled.
Before installing sockets and switches, preparation must be completed, which includes:
- Schematic representation of future electrical wiring;
- Sketching a diagram for the walls and ceiling (marking);
- Selection and cutting of cable cores;
- Punching a trench for the cable (if they are hidden).
We will tell you in detail about each stage of preparation for installing an electrical wire in the house.
Wiring diagram options
Do-it-yourself installation of electrical wiring in a private house begins with sketching two diagrams:
 Both schemes are designed at your own discretion, depending on the number of electrical energy consumers and the choice of places for their installation. It is not even necessary to use the generally established designations of electrical circuit components: it is important that you just do not forget how to read them. However, you should not ignore the rules described below:
- For high-power electrical equipment, provide grounding in the diagram (connection via a triple cable consisting of cores: “ground”, “zero” and “phase”). It is mandatory for the boiler, washing machine, electric stove, as well as for light sources that are circuit nodes in rooms with high humidity (bathroom);
- Divide the wiring lines for sockets and lighting fixtures into several groups.
Rules for the distribution of wiring for sockets and lighting devices:
- The power of any socket family should not exceed 4600 W when purchasing a wire with an area cross section(hereinafter referred to as PPP) 2.5 sq. mm, made of copper;
- The power of any group of lamps should not exceed 3300 W when purchasing wire with a PPS of 1.5 sq. mm, made of copper;
- Do not create a diagram in which the sockets are connected using the “loop” method. This is especially true for sockets with provided grounding: breaks cannot be made along the length of the “ground” core.
In the diagram, connect each wiring line from group and individual sockets, groups of lighting devices and individual lamps to the distribution panel, which contains auto switches. For all single and for each family of sockets, one machine is needed. Its power must be compared with the power supply of the core used (compliance with the limit value of the current that the wiring is able to carry with all devices powered by electricity connected to the circuit). For lighting devices, the current strength of automatic machines is usually in the range of 10-16 A, and for sockets and groups of them, one of the following values is chosen: 16, 25 or 40 A.
Marking
They begin to mark the route of the electrical cable from the distribution panel, by marking the path of each of them to consumers and the route of each of their branches. It is imperative to mark places where the path changes direction and passes through obstacles, but in such a way that the rules are not violated:
- The cable must run either strictly vertically or strictly horizontally;
- The marking of paths, and, consequently, the installation of horizontal wiring, must be done with an indentation of 0.2 meters from the line of intersection of the plane of the wall and the ceiling to reduce the risk of damage to the protective sheath of the cable;
- All turns of the electrical wire must be made at right angles;
- Along the floors of the attic and between floors, the electrical cable should pass along the shortest path, which comes from the distributor.

To make it convenient to mark the wiring route, use a marking cord purchased at the store. You can make it yourself: just paint the cord with paint, lime or black charcoal. Work with it like this:
- Mark a starting point for yourself and secure the tip of the lace there;
- Pull the cord and press the remaining end to the last point of the route;
- Use your hand to move the central part of the cord and release it;
- When it hits the surface, particles of coal, lime or paint fly out. They settle on the plane, forming a clear marking mark in the form of a straight line.

Attention! Despite the fact that the marking has already been done, the wiring diagrams cannot be thrown away. They can be useful: later you will want to overhaul the house more than once.
How to mark installation and connection boxes, switches and sockets
Where the electrical cable branches and descends to switches and sockets, be sure to install a connection box. But it is replaced with an installation box if you have hidden wiring and use switches with closed-type sockets.
Markup nuances:

Attention! Follow safety rules. In this regard, the distance from sockets and switches to grounded devices made of metal (sinks, stoves, pipes) must be at least 0.5 meters. You cannot install sockets with switches in the pantry, but you can install them on the outside.
Marking electrical wiring in rooms with high humidity
To outline the location of sockets and switches in rooms such as a shower, sauna, bathtub or toilet, you need to remember that they have 4 zones:
- Mixer or tap area;
- Sink, shower, bath, sauna area;
- The area from the sauna, bath and sink, covering spaces within a radius of 60 centimeters from them. The presence of fixed partitions is not considered;
- A zone covering a space within a radius of 240 centimeters from zone 3.
Attention! It is prohibited to install electrical wiring units in zones 1, 2 and 3. In zone 4, sockets with a device are allowed to be installed protective shutdown(RCD), which are triggered by a current leak of 30 mA.
How to place a lamp on the ceiling
Procedure:
- Draw straight lines on the floor connecting opposite corners of the room;
- Place a bold dot at the place where they intersect;
- Transfer it to the ceiling using a plumb line;
- From the point marked on the ceiling, mark a wiring route connecting the light source to the connection box.
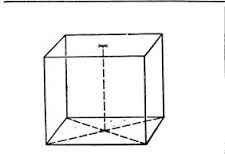
Attention! If you want to have more than one lamp in a room, then first you need to mark an axis running longitudinally to the center of the room. Then on the axis you need to mark the points where the chandeliers or lamps will be installed. Using a plumb line, the marks are carried from the floor to the ceiling.
Installation of electrical wiring in a country house
Before you begin installing electrical wiring, you need to prepare a set of tools:
- Assembly knife;
- Screwdriver Set;
- Pliers;
- Bulgarian;
- Round nose pliers (can be replaced with pliers for stripping cable ends);
- Indicators of phase and integrity of the electrical circuit;
- 100% rubber gloves;
- Rotary hammer - electric drill.
Check availability of materials:
- Electrical panel;
- Insulating tape;
- Switches with socket boxes;
- Installation boxes, possibly connecting boxes (if it is open wiring);
- Tags predefined for marking wires;
- Terminal blocks for combining cables of different thicknesses and cross-sections;
- Cable of the selected diameter and cross-section.
Advice! For home electrical wiring, choose a wire with a cross-section of 1.5 to 2.5 square meters. mm. However, for cables going to powerful appliances (stove, boiler), thicker cables are allowed. This will help reduce the resistance inside and also make the wiring safer.
 If all instruments and materials are present, the operation can begin.
Cable preparation
First, use a mounting knife to cut off the cable of the required length: each piece should be equal to the length of the route between the connection and installation box, as well as between other structures. If the route between them is too long, you can install intermediate boxes. But it will be better if the number of adhesions is minimal.
Attention! Cut the wire with a margin of 10-15 centimeters to carry out electrical work on connecting cables inside electrical circuit nodes.
Types of wiring: open and hidden
After preliminary preparation, they begin its direct installation according to the drawn up diagrams. You can do this in two ways: open And closed. The open method is suitable if you are going to install electrical wiring in wooden house with your own hands. And closed - in houses made of foam block or brick. Let's look at the methods in more detail.
Open wiring
If you do not want to spoil the finish or do the installation of wiring in a wooden house with your own hands, then stop at this option for performing the work. Installation is carried out:
- In plastic skirting boards;
- Cable ducts made of plastic, which goes out on its own in case of fire;
- Fireproof corrugated sleeve.
Today it is recommended to opt for an electrical box (cable duct) or a corrugated sleeve. The latter is usually used in commercial premises. It is secured to the surfaces with plastic holders, and they can be fastened with anything: dowels, screws or simple self-tapping screws.
 The electrical box includes two parts in the shape of the letter “P”, which are connected using a locking method. First, install the lower part of the box into the wall, into which the cable is laid. Then the top of the box is positioned so that the jester of the latching lock can be heard.
 At points where the wiring branches, you will need branch boxes. And to assemble switches and sockets you will need stands made of insulating materials (plastic, wood). They are called socket boxes.
Hidden wiring
This best option for stone houses. Method hidden wiring involves laying the cable in grooves, which are made according to the drawn up markings. And for hidden nodes, recesses are made that go 6-7 cm deep into the wall. Subsequently, the boxes are fixed with gypsum or cement, and the channels are plastered.
 Hidden wiring is more difficult to do than open wiring. And if you need to gain access to the cable, you will need to destroy part of the wall. But in terms of aesthetics, this is the best option, since home design is not spoiled by sockets carelessly sticking out of the walls.
With closed wiring, the places where the wires are connected are provided with special boxes, which are fixed strictly according to the markings. It is important that after installation of the wiring the boxes remain accessible. Otherwise, monitoring connections during operation will be impossible.
Installation of boxes
To enter the cable into the boxes you will need insulating bushings. They can be replaced with parts of PVC pipes. They are simply necessary if the boxes are made of metal, since the holes for the wires in them have sharp edges. The cable can easily become damaged.
 The connection itself in the boxes is made by soldering. You can also connect the cables using clamps or sleeve crimping. Sometimes twists are made in living rooms. This is not the most reliable connection option, but it is quite suitable for rooms where humidity is always low. It is only important to make a tight twist and carefully insulate it.
Sockets and switches
The installation of sockets and switches is carried out after the installation or junction boxes have already been put in place, as well as the socket boxes. The cable should already be connected to the installation site. The installation method will directly depend on what type of wiring you have chosen: closed or open.
If the wiring is open
You already realized that in this case you will need socket outlets. Their role is played by pieces of insulating material - circles with a radius of 3-4 centimeters and a thickness of 1 centimeter. Organic glass, wood, getinax or textolite are excellent for this purpose.  First, the socket boxes are installed using liquid nails or self-tapping screws with countersunk heads. Then they attach either a switch or a socket device with a removed plastic casing, which hides the insides of the socket behind it.
Wires lead to the socket: “phase” and “zero” are required. Sometimes the ground is connected. into a phase wire break. This means that only the phase should be supplied from the connection box to it, which returns to the box in another way: through the lamp. As for the “zero”, it runs parallel to the “phase”, but it goes around the switch.

Attention! You cannot connect the phase and neutral wires to the switch at once, as inexperienced “electricians” do. This connection results in a short circuit.
In order not to confuse the phase wire with others, you need to use tags when laying it. And if they are not there, then all that remains is to remember the color of the “phase”. If the wiring is already installed and connected, then you can find the phase using an indicator screwdriver.
Standard cable colors:
- Blue – general, or “zero”;
- Yellow with a green spiral stripe – grounding, or “earth”;
- Black, white, brown or red - phase, or “phase”.
Attention! Sometimes electricians confuse the colors of the wires, and under the “zero” there may well be a “phase”. To protect yourself during electrical installation work When wiring has already been completed, it is necessary to check the phase wire with an indicator screwdriver. But if you did the wiring yourself, you should not have any problems determining the purpose of each of the wires.
If the wiring is hidden
Installation is carried out in installation boxes made of plastic or metal:
- Remove the top plastic cover from the switch or socket box;
- The cable is connected to the terminals inside according to the principle described for the open type of wiring. Only the phase wire is supplied to the switch, and to the lamp - together with the neutral wire, so that they meet together at the box. Both phase and neutral wires are supplied to the socket;
- From the inside, secure the switch or socket in the box with spacer clamps. For this purpose, they are tightened with a screwdriver until the screws stop;
- When the sockets with switches are already secured inside the junction box, screw a protective housing cover made of plastic on top. It will cover the inside of the box.
Attention! Despite the variety of switches and sockets, the principle of their installation in the case of open and closed wiring remains the same. Therefore, this instruction can be considered universal.
Now the gasket operation electrical wires in the house is completed. All that remains is to connect electrical appliances and light sources. And comfort and warmth will come to your home.